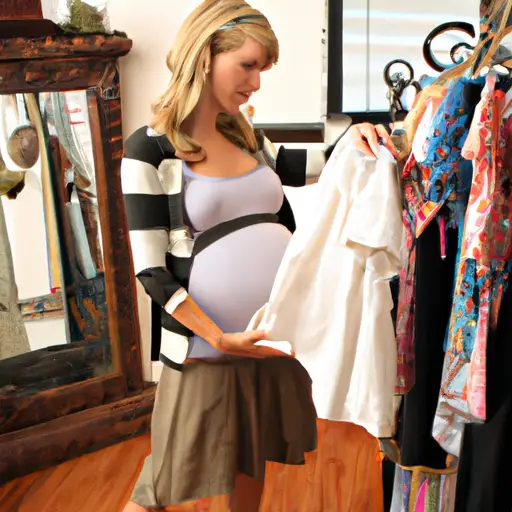
Repurposing Old Clothes with DIY Projects
Get Creative: Revamp Your Closet with these Repurposing DIY Tips
Hey there, fellow fashion enthusiasts! Are you tired of buying new clothes every season just to keep up with the latest trends? Well, I have the perfect solution for you – repurposing! Repurposing is the art of taking old clothes and revamping them into something new and fashionable. Not only is it an incredibly sustainable way to update your wardrobe, but it’s also a fun and creative way to express your personal style.
Now, before we dive into the wonderful world of DIY repurposing, let me first explain what it means. Repurposing is essentially the act of taking something old or unused and giving it a new purpose. In the case of fashion, we’re talking about taking old clothes (perhaps something you haven’t worn in years) and transforming them into something completely new and stylish!
The benefits of DIY repurposing of clothing are many. For one, it’s a fantastic way to save money. Instead of constantly buying new clothes, you can simply repurpose the old ones you already have. It’s also a great way to reduce your environmental footprint. By repurposing old clothes, you’re helping to reduce textile waste and supporting a more sustainable fashion industry.
So, are you ready to get your DIY on? Great! Let’s dive into the world of DIY clothing repurposing by discussing the materials you’ll need.
Getting My Supplies
Now that I have a plan in place and have selected my DIY repurposing project, the first step is to gather up all of the supplies I need. Some of the essential supplies needed for a clothing repurposing project include scissors, pins, a seam ripper, a measuring tape, and a sewing machine. However, depending on the specific project, there may be other supplies and materials required, such as zippers or fabric glue.
Before I head out to the store to get these supplies, I take the time to carefully review the tutorial or pattern I will be using for my project. This helps me make a list of all the supplies I need to purchase and ensures that I do not overlook any important items.
I like to shop for my supplies at thrift or hobby stores, as they often have a wide selection of supplies at affordable prices. Additionally, I enjoy the hunt of finding unique or vintage materials to use in my projects.
Once I have all of my supplies, I set them up in a designated workspace where I can easily access everything I need during the execution of my project. With everything on hand, I am ready to start creating my repurposed garment.
Get Your DIY On: Patterns and Tutorials to Repurpose Your Old Clothes
Okay, it’s time to get down to business. If you’re anything like me, the idea of turning your old, tired clothes into something new and exciting can be a bit intimidating. But, fear not! There are plenty of patterns and tutorials out there to guide you.
Gathering Supplies
Before we get started, let’s make sure you have all the supplies you need. Depending on the project, you’ll likely need some basic sewing supplies like a needle and thread, a sewing machine, and fabric scissors. You might also need some additional supplies like buttons, zippers, or elastic. Make sure you have everything you need before you dive in!
Finding Patterns and Tutorials
One of the best things about the internet is that there are endless resources for finding patterns and tutorials for just about any DIY project you can imagine. Some of my go-to sites for repurposing clothing include Pinterest, Etsy, and YouTube. You can also find free patterns on blogs or paid patterns on sites like Craftsy or Spoonflower.
Inspirational Projects
If you’re looking for some inspiration before you start your DIY project, check out some of the amazing repurposing projects out there. Some of my favorite projects include turning an old t-shirt into a tote bag, transforming a pair of jeans into a cute skirt, or adding lace or embroidery to a plain t-shirt or sweater. The possibilities are truly endless!
Choosing Your Project
When choosing a project, it’s important to pick something that matches your skill level and interests. Don’t try to take on a project that is too advanced if you’re just starting out. Similarly, if you hate sewing, don’t pick a project that requires a lot of complicated stitching. Choose something that excites you and that you feel confident you can complete.
Executing Your Project
Alright, now it’s time to get started on your project. Make sure you have all of the necessary supplies and equipment, and follow the instructions or tutorial carefully. Don’t rush through the project – take your time and pay attention to details. If you get stuck or need help, don’t hesitate to reach out to other DIYers for advice or support. And most importantly, have fun with it!
Finishing Touches
Once you’ve completed your repurposing project, don’t forget to add some finishing touches to make it truly unique. Add some buttons, sequins, or beads, or consider adding some embroidery or iron-on patches. These small details can take your project from good to great.
Conclusion
Repurposing your old clothes through DIY projects is a fun and sustainable way to breathe new life into your wardrobe. Whether you’re a seasoned DIYer or just starting out, there are endless patterns and tutorials out there to guide you along the way. So, go forth and repurpose!
Inspirational Projects: Get Inspired for Your Next DIY Clothing Repurposing Project!
Okay, it’s time to get inspired. I love scrolling through Instagram and Pinterest to get ideas for my next DIY clothing repurposing project. There are so many talented people out there who turn old clothes into beautiful and unique pieces of clothing. Here are some of my favorite projects:
The Oversized Shirt Dress
This project is perfect if you have an oversized shirt that you don’t wear anymore. Simply cut the sleeves off and sew the bottom shut to create a dress! You can add a belt if you want to cinch it in at the waist. This project is easy and perfect for summer.
The Denim Skirt
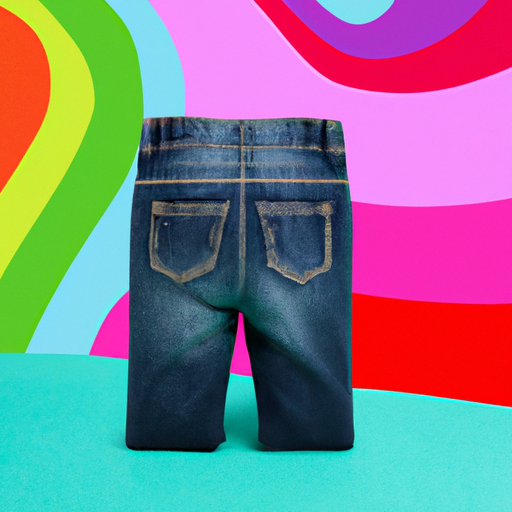
I love this project because it’s so versatile. You can use any old pair of jeans to create a cute denim skirt. Simply cut off the legs and sew the top shut. You can add patches or embroidery if you want to make it even cuter. You can dress it up or down, depending on the occasion.
The Patchwork Jacket
This project is a little more advanced, but it’s so worth it. If you have a few different jackets that you don’t wear anymore, you can cut them up and sew them together to create a patchwork jacket. You can use different fabrics as well, like denim or leather. This project takes a little more time, but the end result is gorgeous.
The Tie-Dye T-Shirt
Tie-dye is back in style, and it’s so easy to do at home. You can take any old white t-shirt and tie-dye it to give it new life. There are so many different techniques you can use, like the spiral or the bullseye. This project is fun and perfect for a weekend activity.
These are just a few ideas to get you started. The possibilities are endless when it comes to repurposing old clothes. Always remember to have fun and let your creativity shine!
5. Choosing a Project: What Floats My Boat
Now comes the exciting part, choosing which recycled clothing project to work on! But before diving into the deep end, remember to keep in mind a few important things.
First, assess your skill level. Determine if the project you’re eyeing is something you can handle or if it’s better left to the sewing professionals. Second, consider the materials and resources you have on hand. Try to choose a project that you can complete using materials you already have or can easily acquire on a budget.
Third, think about the purpose of the project. Are you trying to up your style game or just looking to make something practical? Keep in mind the events or occasions you plan on wearing the item to, and choose something that fits your needs.
Lastly, don’t forget to follow your own personal style and taste. There’s no point in creating something you won’t ever wear, so choose a project that truly resonates with you. Whether it’s a funky accessory or a stylish top, go with what floats your boat.
Getting my old clothes ready for a DIY project
Time to sort through your closet and find the perfect piece of clothing to repurpose! But before diving in, let’s make sure it’s in the best condition possible.
Clean it up
It’s important to start with a clean slate, so make sure your chosen item of clothing is freshly laundered or dry cleaned. This way, any spots or stains can be dealt with before you start the repurposing process. Plus, no one wants to work with stinky clothes!
Inspect it thoroughly
Before cutting or altering anything, inspect the piece of clothing closely for any signs of wear and tear. Look for holes, tears, or weak seams that may cause problems later on. You don’t want to spend time and effort creating a masterpiece, only to have it fall apart after one wear!
Size it up
Make sure to try on the clothing item before starting to determine whether it fits properly. If it’s too small or too big, you may need to alter it even further than your original idea. This can help avoid frustration later on.
Get to know the fabric
Finally, it’s important to know the fabric and material of your clothing item. Some fabrics are more stretchy or prone to fraying than others, so you’ll want to adjust your crafting methods accordingly. Knowing the fabric type will also help you choose the right needles, thread, and sewing techniques for your project.
By taking the time to properly prepare your old clothes for a DIY project, you’ll be setting yourself up for success. So grab your scissors and let’s get crafting!
Executing the Project: Let’s bring our DIY project to life!
Alright, we’ve gathered our supplies, chosen our project, and prepared our old clothes. Now it’s time to bring our DIY project to life! The first step is to follow the steps from the tutorial or pattern we’ve chosen. Make sure to read through the instructions carefully before starting. If we skipped any steps, we might miss important details and end up with a project that doesn’t turn out the way we want it to.
As we work, we might find that some steps are more challenging than others. Don’t get discouraged! If we make a mistake or get stuck, we can always refer back to the tutorial or do some research online. There are many online forums and groups where people share their DIY clothing projects, and we can learn a lot from their experiences.
When we finish sewing or cutting, we might feel like our project looks a little plain. This is where we can add our own personal touches to make it unique. Adding buttons, patchwork, or embroidery are just a few ways to take our project to the next level. Don’t forget to share our finished product with others, it’s a great way to inspire them to try their own DIY repurposing projects.
With these tips, we’re ready to take on our repurposing project with confidence. It might take some practice and trial-and-error, but the end result will be worth it. Let’s get started!
For more inspiration on how to repurpose old clothes, check out Leah’s guide and get some more great ideas!
Adding the Perfect Final Touches to Your DIY Repurposed Clothes Project
Alrighty, folks, we’ve come to the final stretch! But before you start sporting your brand new DIY repurposed clothing, there are some finishing touches to add. These final touches are what make your project unique and personalized.
Now, let’s dive in and explore how you can put the icing on the cake of your DIY repurposed clothing.
Embellishments
Embellishments are an excellent way to make your DIY repurposed clothes stand out from the crowd. You can give your clothing a unique look with ribbons, buttons, or patches. Don’t hesitate to get creative with this part of the project.
Trimming
Trimming is another great way to add a personal touch to your repurposed clothing. You can use lace, braid, bias, or binding tape to create a beautiful trim for your project.
Hemming
Hemming is essential when it comes to your DIY project’s final touches. You want to make sure your clothing looks sharp and presentable. Don’t be afraid to experiment with different hemming styles like rolled, blind, or zig zag.
Ironing and Pressing
This may seem like an obvious final touch, but it’s crucial. Ironing and pressing your garment can make all the difference in how it looks. Be careful not to burn your project; use the proper settings and materials.
With these final touches, your DIY repurposed clothing project is ready to make its debut. Congratulations on completing your project, and don’t forget to show it off!
Wrap It Up: My Experience with DIY Clothing Repurposing
Well folks, that’s a wrap! I hope this guide has inspired you to repurpose your old clothes and get creative with DIY projects. From gathering supplies to executing the project, I hope you’ve gained some valuable insights and tips for successful repurposing.
Personally, this entire process has been incredibly rewarding for me. Not only have I saved money by not buying new clothes, but I’ve also been able to express my personal style in unique and sustainable ways. Plus, there’s something so gratifying about turning something old and forgotten into something new and beautiful.
If I could offer one piece of advice, it would be to choose a project that speaks to you personally. The more invested you are in the project, the more likely you are to see it through to completion. And don’t be afraid to make mistakes or try new things – that’s the beauty of DIY repurposing.
So go ahead, raid your closet and get crafting! Whether you’re a seasoned DIYer or a beginner, there’s a project out there for everyone. Who knows – you might just discover a new hobby you never knew you loved.
Thanks for joining me on this repurposing journey. Happy crafting!
